If you use Thunderbird for your email software, this article will describe how to get your address book file saved to a jump drive. You’ll need to do that either when you move your email to another computer or you want to back up your address book. Doing that on occasion is a very good idea!
Exporting Your Address Books
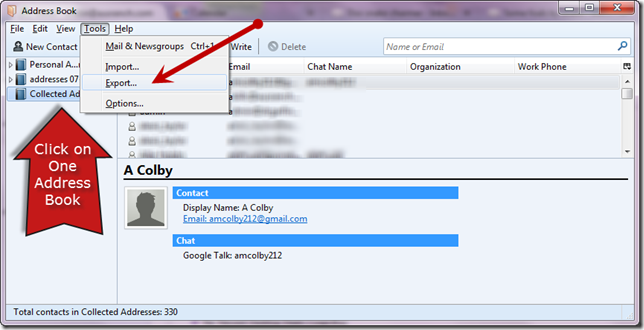
First, you need to pull up your address book window. Go to the Tools Menu and choose Address Book. The address book window will open. All of your address books will be listed along the left. Chances are you’ll have more than one and each will have to be handled separately. Click on one of them. Then go to the Tools Menu of the Address Book window and choose Export.
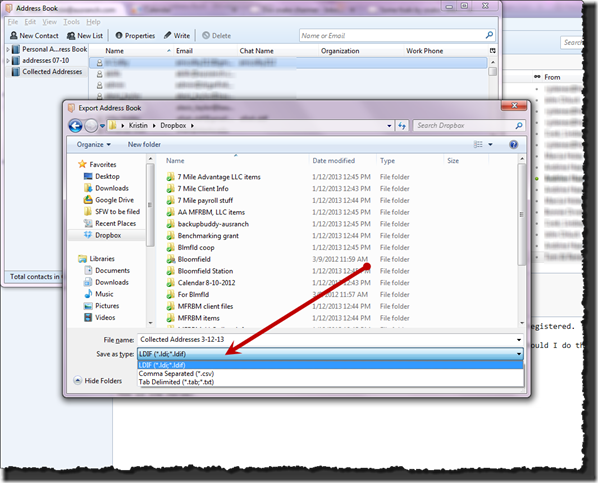
Choosing Export will bring up a standard Save As type window. Choose your location. If you are moving your address books to another computer, you’ll choose your jump drive. That jump drive should have been inserted into a USB port of your computer prior to this or you won’t get the option to save to it in the jump drive. In the example pictures, I choose my Dropbox folder which is a great place to choose if you are backing your files up.
You’ll want to name your file something related to the name of the Address Book you choose – that’s why I called this Collected Addresses. If you are moving to another computer, leave the File Type set to LDIF because that’s the address book format. However, if you want to save it in a format that will let you look at and read the file, choose the Tab Delimited format because you’ll be able to open that in Notepad or Word. I left this file in LDIF so we can use it to import on another computer.
If you are just backing up your files, you’ll want to repeat this process for each of the other (in this case three) address books and then you are done. If you are moving files to another computer, you’ll also have to repeat each step and then go on to the Import section too.
Importing Address Books in Thunderbird
Of course you’ll have to safely remove your jump drive and insert it into the new computer. Start Thunderbird on the new computer and choose Tools Menu and Address Book again.
On the Address Book window, choose the Tools Menu and Import.
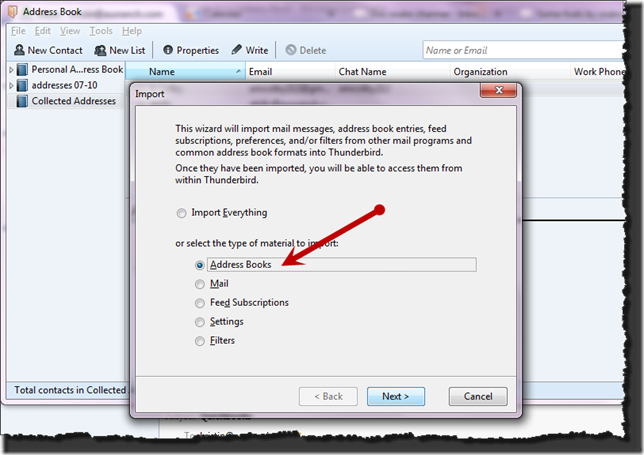
You’ll want to choose just the Address Books to import. Click Next.
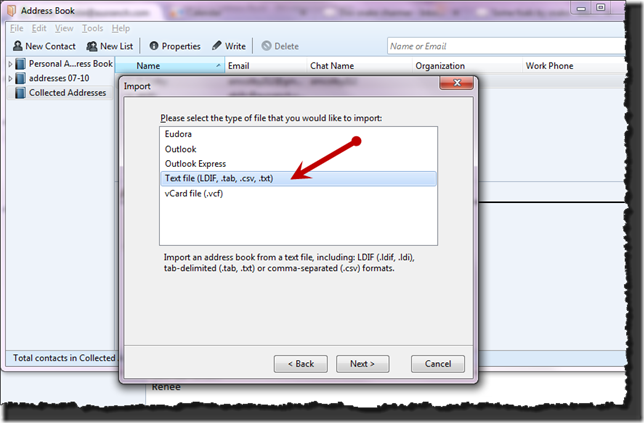
In the next dialog box, it asks for the type of file you are going to Import. Select Text File. You’ll see that includes the .LDIF file type that we made on the old computer. Click Next.
When you click Next, a Browse window will open so you can select your file. Navigate to your jump drive, find the first one of your address books and click Open.
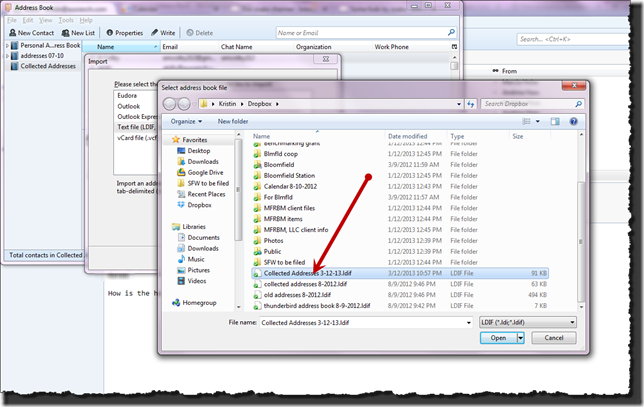
When you click Open, your Address Book should automatically import. It takes just a second and you should get a message indicating it was successfully imported. Repeat that for the rest of your address books and you should be ready to send emails to all of your old addresses.